Showing posts with label Cakes. Show all posts

Tuesday, May 10, 2022

Easy vegan custard slice with Spanish Tortas de Aceite, step by step


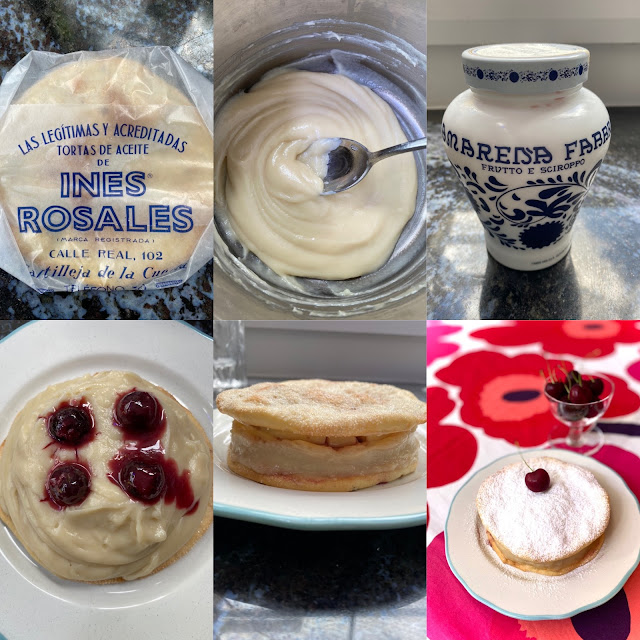
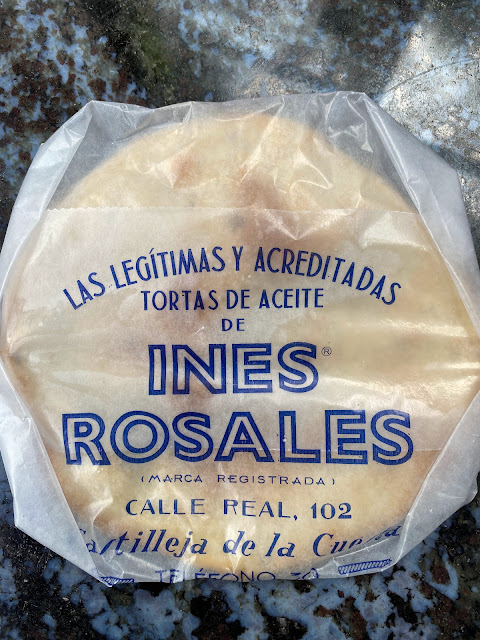
Thanks to my friend Ray I have recently discovered these sweet Spanish Ines Rosales' tortas (there is also a savoury version). And noticing that they are vegan I thought of making a quick dessert, a bit like a custard slice, which I love, with them!


For the custard I used oat milk (barista style).

Ingredients:
1 tbsp flour
2 tbsp sugar
250 ml oat milk
a few drops of vanilla essence
2 sweet Ines Rosales pastries
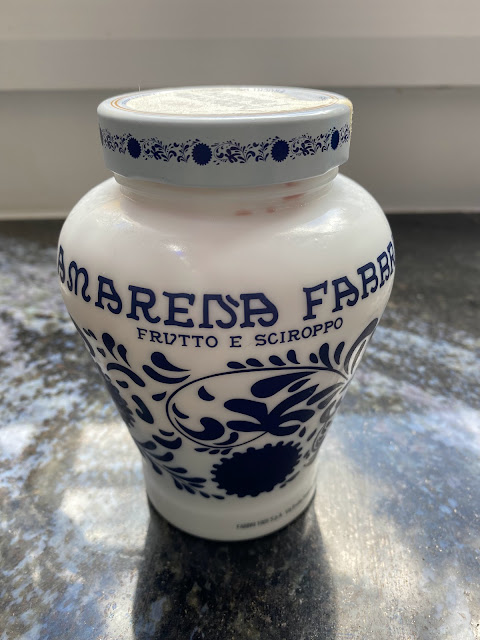
Amarena cherries (optional)
Icing sugar to sprinkle
Fresh Fruit to serve (optional)


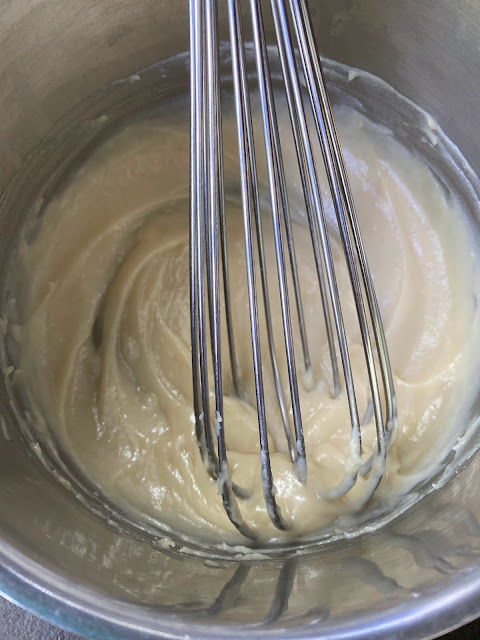
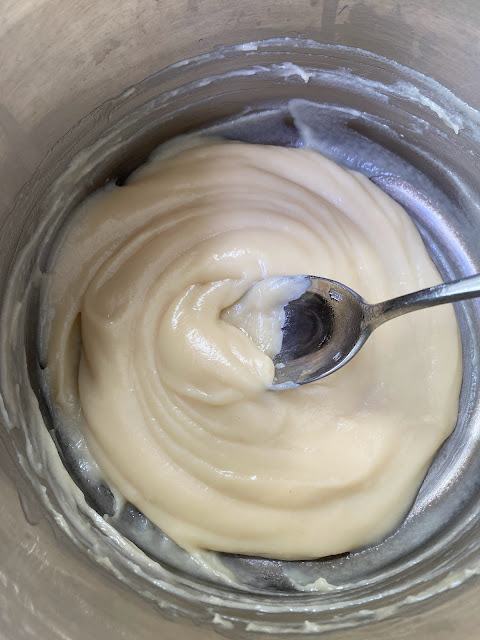
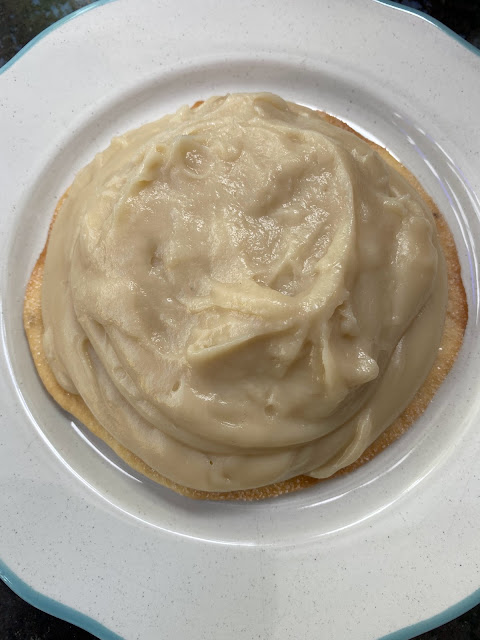
Mix the first three ingredients together and bring to a simmer, stirring constantly. Add the vanilla at the end. You should cook this custard until it is quite thick, and then keep stirring after cooking until it is lukewarm and no more steam comes out. Make sure that is thick, not runny!


Pile the custard on one of the pastry


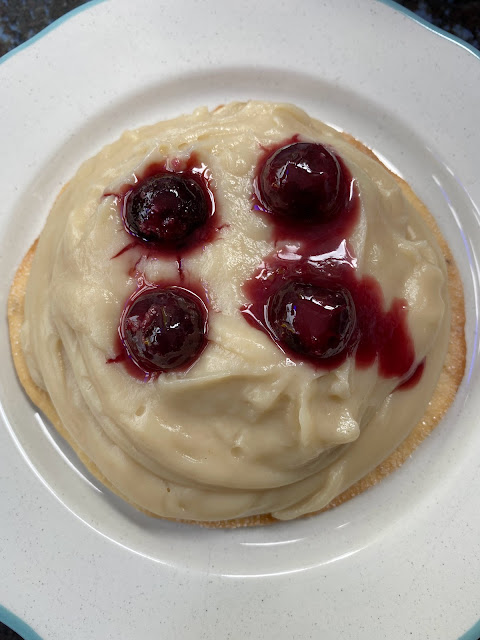
I had some amarena cherries so I though of adding 4 to the custard, but any fresh or preserved fruit would work too. Just don't add too much 'juice'.


Place the second pastry on top and press lightly, smoothing the custard on the sides with a small spoon, if necessary. Sprinkle with icing sugar and refrigerate for a few hours.


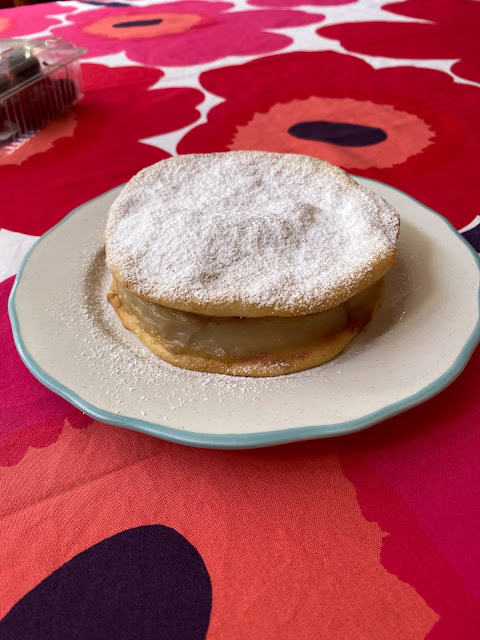
This actually served three people, and we had fresh cherries on the side. I'll definitely make it again, probably with berries or with fruit preserved in alcohol! Yum! A real treat!


 Photos and Recipes by Alessandra Zecchini ©


Sunday, June 12, 2016

Gluten free, fat free, sugar free, vegan chestnut and cocoa cakes


 I used one cup of Italian chestnut flour (only used Italian chestnut flour, the chestnuts have been toasted prior to grinding and have a special sweet taste and lovely texture!), 2 tsp cocoa, a few sultanas and enough water to make a batter. I poured the batter in silicone moulds and baked for about 20 minutes (until a toothpick came out clean). Very yummy, incredibly filling, and healthy too.

Photos and Recipes by Alessandra Zecchini ©

Saturday, August 29, 2015

The Famous Aquafaba meringue makes a good Vegan 'Pavlova'


"Vegan baker Goose Wohlt coined the term aquafaba ("bean liquid") to describe the liquid, which French chef Joël Roessel discovered could be used in recipes much like egg whites."
Source; Wikipedia

 To get aquafaba basically all you need to do is to drain a can of chickpeas, keep the liquid and then beat it. Don't do it by hand though, unless you have strong arms, it takes longer that egg whites. But wow it peaks! And white and fluffy too! I got quite emotional seeing it, like a wonderful chemistry experiment.

After beating for 3-5minutes
After 7-8 minutes
After adding sugar and cornflour
Taaa-daaa!

But what to make first?  I was tempted to make an Italian meringue, but didn't want to add hot syrup to my new discovery, in case the magic stopped! No, I decided, I'll do that next time and stick to something easy.


Ingredients

Base
1 Can of chickpeas (just the brine - i.e. water, which already has salt)
250 g icing sugar
1 tbsp cornflour
1 tbsp white vinegar
a few drops of vanilla essence

Topping
1 can coconut cream
1 tsp golden syrup
a few drops of vanilla essence
Green and gold kiwi fruit and/or strawberries and edible flowers

Beat the chickpea brine first, then when it is nice and peaky add the sugar, one tbsp at the time, and the cornflour. Add the vinegar and vanilla at the end and beat some more.


Not confident enough to try a single Pavlova I made two disks, plus some little ones to see how they baked. I had the oven on first very hot, and the at about 75°C fan for about three hours, actually more, it seemed to take forever! In the meantime I also whipped some coconut cream (Vegan Pavlova, remember?), I find that the Family Choice coconut cream has the thickest cream of all, in fact so thick that you don't need to refrigerate the can first, and can use the liquid a the bottom of the can to thin it down. I added a tsp of golden syrup (Maple syrup is good too) and a few drops of vanilla, and then set the cream aside in the fridge.

Coconut cream
 
I didn't end up assembling the 'Pavlova' until the day after, but the meringue was still good and the cream nice and stiff. I only put fruit in between the two layers, and reserved the cream only for the top. Possibly the disks were too large and they cracked a little, the smaller meringues looked great and made me plan for macaroons.  


The taste

It tastes as good as it looks! BTW, the primrose flowers are edible. I eat a lot of flowers too!

 Photos and Recipes by Alessandra Zecchini ©

Thursday, February 14, 2013

Vegan chocolate-hazelnut spread and Vegan chocolate brownie


This didn't start as a brownie, it started as a vegan chocolate-hazelnut spread. I had some hazelnuts to roast, and after doing that I decided to use a few for a nutella like spread, but vegan... and more chocolaty :-). 

Vegan chocolate-hazelnut spread

5 tbps roasted hazelnuts (remove all skin too!)
3 tbps rice bran oil
100 gr dark chocolate (72% and dairy free)
50 ml hot water

Blend the hazelnuts and oil with an immersion blender until you get a cream. In the meantime melt the chocolate with hot water at bain-marie (nothing bad will happen, just keep stirring!). Mix everything together. If the hazelnuts are not fresh or oily enough you may need a bit more oil.


But my problem is that when I have a chocolate spread I don't spread it, I eat it all with a spoon! Too dangerous, I had to make something with it. What about a Vegan chocolate slice, a bit like a Vegan chocolate brownie...


Vegan chocolate brownie

6 tbsp of Vegan chocolate-hazelnut spread (recipe above)
100 g ground almonds
2 tbsp sugar
100 g self rising flour
200 ml soy milk
100 g dark chocolate broken into small pieces with a knife
Icing sugar to dust (optional)

Gently heat the chocolate-hazelnut spread until is soft (not melted) enough to make it easier to fold in the rest of the ingredients. Start with the ground almonds first, then add the sugar, half of the soy milk and half of the flour. Fold in the rest of the ingredients (if it looks too thick add a bit more soy milk) and the chocolate, then pour into a square or rectangular baking tin lined with baking paper. Bake at 160 C for about 30 minutes, or until the surface looks cooked but the centre is still a little soft. Dust with icing sugar (optional) and set aside to cool down. Cut only when completely cold and set (in fact wait for a day if you can!).


It is yummy and delicately nutty with lovely pieces of dark chocolate melting into every bite.


Photos and Recipes by Alessandra Zecchini ©

Friday, September 28, 2012

Vegan Nashi Tart


I love nashi pears, pity that the season is short... mostly I eat them raw, cut into thin slices, but since I had quite a few I wanted to make a quick tart. This is too easy! I just used one sheet of ready rolled vegan puff pastry, then I peeled and cut 2 big nashi pears and placed the slices on top. I finished everything with a dusting of icing sugar and placed the tart in the oven until the edges of the tart were puffy and golden. As a final touch I sprayed the tart with some grappa spray. Nashi are good for cooking and baking because they keep their shape and don't become brown! This I will make again, it was even better than an apple tart, which is saying a lot (for me!).


Photos and Recipes by Alessandra Zecchini ©


Saturday, September 22, 2012

Vegan "Cape-pops", and a vegan pear and chocolate pie


Almost cake-pops because they look like cake-pops, but they are not made from cake! In fact these are Cape Gooseberries (therefore I am calling them Cape-pops :-)), dipped in dark chocolate. I left some plain, while I rolled the others in shredded coconut, ground pistachio nuts, and plum powder (my new discovery, I talked about it already in here). I let them set first at room temperature and then, because it was a warm day, in the fridge. These are gluten free too!


But more to come...


I had melted far too much chocolate for the Cape gooseberries, so I made a pie which, I must say, came out better than I had anticipated. But sometimes new discoveries are born out of chance, or leftovers!

I had a few sheets of filo pastry left, I placed them into a 23 cm pie dish lined with baking paper, leaving the corners to spill out. I peeled and cut four pears and placed the slices over the pastry, then drizzled the lot with Frangelico liqueur. I added the melted dark chocolate and closed the four corners of pastry over the filling. I wetted the top pastry with water and I added the rest of the coconut/pistachio stuff on top too (why waste it!). I baked the pie until the pastry was golden, and then I sprinkled a little icing sugar on top (this was the only sugar needed). I pie was perfect! Bittersweet and with an amazing texture, the chocolate had 'melted' into the pear slices... I will need to work on this and make it again, on purpose, and with more filo pastry, but I wanted to share it with you now because to me this was the perfect Vegan pie!!


Photos and Recipes by Alessandra Zecchini ©

Sunday, August 19, 2012

Sweet potato Vegan and gluten free cakes


 One of my favourite Japanese sweet is the baked sweet potato wagashi. I made something similar to this before, and I thought that the New Zealand kumara looks like a Japanese potato... but then I ended up with something completely different :-).


First of all kumara are much softer that Japanese sweet potatoes, then I only had an orange kumara at home (the red ones are better because they are white inside). I thought of baking my kumara, as steaming it was going to make it even softer and in the meantime I drunk a bit of Umeshu,  (my husband came back from Japan with a bottle of Choya Umeshu, sweet plum sake) and decided to soak a few sultanas in some too to add to my cakes. Once my kumara was done I quickly realized that it was going to be far too soft for molding, so I reverted to plan B, i.e. not shaping the sweets by chakin shibori (with a muslin cloth or handkerchief), but simply dropping them on the baking tray with a spoon! For one mashed kumara I added 2 tsp of brown sugar, and then 'dropped' three tablespoons of the mixture on the baking tray. I did the other three adding the sultana soaked in Umeshu, just to make a variation. 


 I baked everything at 180°C for about 15 minutes. To look at them I think that these are among the ugliest sweets I have ever made, but they tasted incredibly good, especially the ones with the sultana. I will make them again, but I will also look for some more 'floury' sweet potatoes (not kumara) so if you know where I can get some in Auckland please let me know!


Photos and Recipes by Alessandra Zecchini ©

Friday, June 29, 2012

Castagnaccio, Vegan, gluten and sugar free chestnut flour cake


First of all I have to inform you that I was raised on chestnuts, and chestnut flour. We made many things with the flour, mostly fritters (you can find the recipe here) and castagnaccio. There are so many versions of castagnaccio, the main being just chestnut flour and water, with a pinch of salt (optional) and a sprig of rosemary on the top. The best thing is that chestnut flour is naturally sweet, and that you just need water to mix it, making it the perfect low fat (chestnuts are the only low fat nuts) high protein, gluten free and vegan treat!


I mixed chestnut flour with enough water to make a batter, and this time I added 2 tbsp of cocoa (cocoa also go well with chestnuts) and a very small pinch of salt. No sugar needed. Pour the batter into a large baking pan lined with baking paper and bake everything at 180°C until the cake is ready (about 20 minutes, check with a toothpick). Let it cool down before serving. Unfortunately I forgot to take the photo on the first day, so this was the morning after and the top of the castagnaccio had cracked like a dry desert... but it was still great for breakfast :-).


Photos and Recipe by Alessandra Zecchini ©

Sunday, May 27, 2012

Vegan Banana Cake, with sultana and grappa


Ingredients:

2 tbsp sultana
1 small glass of grappa
5 ripe bananas
A few drops of lemon
100 g icing sugar + some for dusting
100 ml vegetable oil
200 g self rising flour

Soak the sultana in the grappa. Mush the bananas with the lemon juice, add the sugar and the other ingredients and beat well, then fold in the sultanas with the grappa. Grease a cake mould and pour the cake mixture in, bake at 180°C for approximately 30 minutes or until a toothpick inserted into the cake comes out clean. Reverse onto a serving plate and serve warm or cold. This cake is very moist and delicious, great with tea or coffee, I even have it for breakfast (don't worry about the grappa, you can barely taste it and the alcohol is all gone!).


Photos and Recipes by Alessandra Zecchini  ©


This recipe is for Sweet New Zealand, the monthly blogging event hosted this month of May by Jemma

Sunday, October 2, 2011

Monday, September 19, 2011

A Vegan Patisserie Class for those who live in the Auckland area.


Scrumptious Vegan Chocolate Cake
with Pastry Chef Eri Ishibashi


Scrumptious Vegan Chocolate Cake
Tutor Pastry Chef Eri Ishibashi

If you are a Vegan and live in Auckland this is for you! Eri is a very talented Vegan Chef, her classes are truly inspiring and she teaches skills that will change your cooking forever!     

when : 2 October, from 11 am
where : Pinevalley B&B,  48 Young Access  Daily flat 0992
cost : only $55 to public,  $50 to Slow Food Members
Lunch included, and then bring the whole cake home with you!

RSVP to Kazuyo, Tel.: 09-442-5701 or kauyo@mindspring.com
Maximum of 6 students


Sunday, August 7, 2011

Chocolate Panforte: Guest Post from a Vegan Author


This wonderful recipe is from Vegan Chef Laurinda Erasmus' book BENESSERE well-being: vegan & sugar-free eating for a healthy life-style, a collection of over 500 vegan recipes, each one with colour photo. 


Laurinda says:

 I encountered this delicious cake in Siena, where entire shops and bakeries are dedicated to making and selling only Panforte. The Italian version was very sweet, with honey, sugar AND glucose syrup. So here is my version of this incredibly tasty cake – filled with lots of different nuts and dried fruit. Only a small amount of apple syrup is used, together with very dark (85%) vegan chocolate and aromatic vanilla-infused oil. Don’t blame yourself if you scoff this in a day or two!

Ingredients
125 g (¾ cup) wholemeal spelt flour

2 tbsp unsweetened pure dark cocoa powder / pure carob powder
1 tsp cinnamon powder
70 g each: almonds (6 tbsp), hazelnuts (6½ tbsp), walnuts (6½ tbsp)
300 g (1½ cups) chopped mixed dried fruit, e.g. prunes, figs, sultanas, cherries, apricots
90 g vegan bitter chocolate (85%) / vegan carob buttons
2 tbsp rice syrup
1 tbsp apple / date syrup
70 g (5 tbsp + 1 tsp) vanilla-infused grapeseed / camellia tea / rice bran oil

glazing:
1 tbsp apple / date syrup  
2 tsp cinnamon powder
1 tsp nutmeg
2 ml ground cloves
4 tsp unsweetened pure dark cocoa powder


1. Pre-heat the oven to 180°C. Line a 1 L baking tin with non-stick baking parchment, or use a silicone dish.
2. Mix the dry ingredients in a large bowl. Add the nuts and dried fruit. Stir well to combine.
3. Heat the chocolate or carob buttons with the syrups and oil in a bowl set over boiling water until molten and smooth. Pour onto the dry ingredients and stir until well combined.
4. Spoon into the baking tin, pressing down to remove air pockets and level the surface. Place a sheet of tin foil over the baking tin.
5. Bake for 50 minutes. Remove the tin foil for the last 5 minutes.
6. Remove the Panforte from the oven and cool in the baking tin.
7. Glaze the cake: brush the syrup all over the top. Combine the dry ingredients and sprinkle half over the top. Press down with a spoon to seal in the stickiness.
8. Remove the cooled (and now very firm) Panforte from the baking tin. Peel off the parchment. Roll the sides of the Panforte in the remaining half of the spice mixture to seal.

The cake should last in an airtight container in the refrigerator for 2 weeks – but not in our household! Cut the cake into 16 slices, as it is quite rich.


Recipe and photo provided by Laurinda Erasmus, from her vegan recipe book BENESSERE well-being: vegan & sugar-free eating for a healthy life-style.  Quinoa Publishing.  www.veganwellbeing.net