Thursday, October 18, 2012

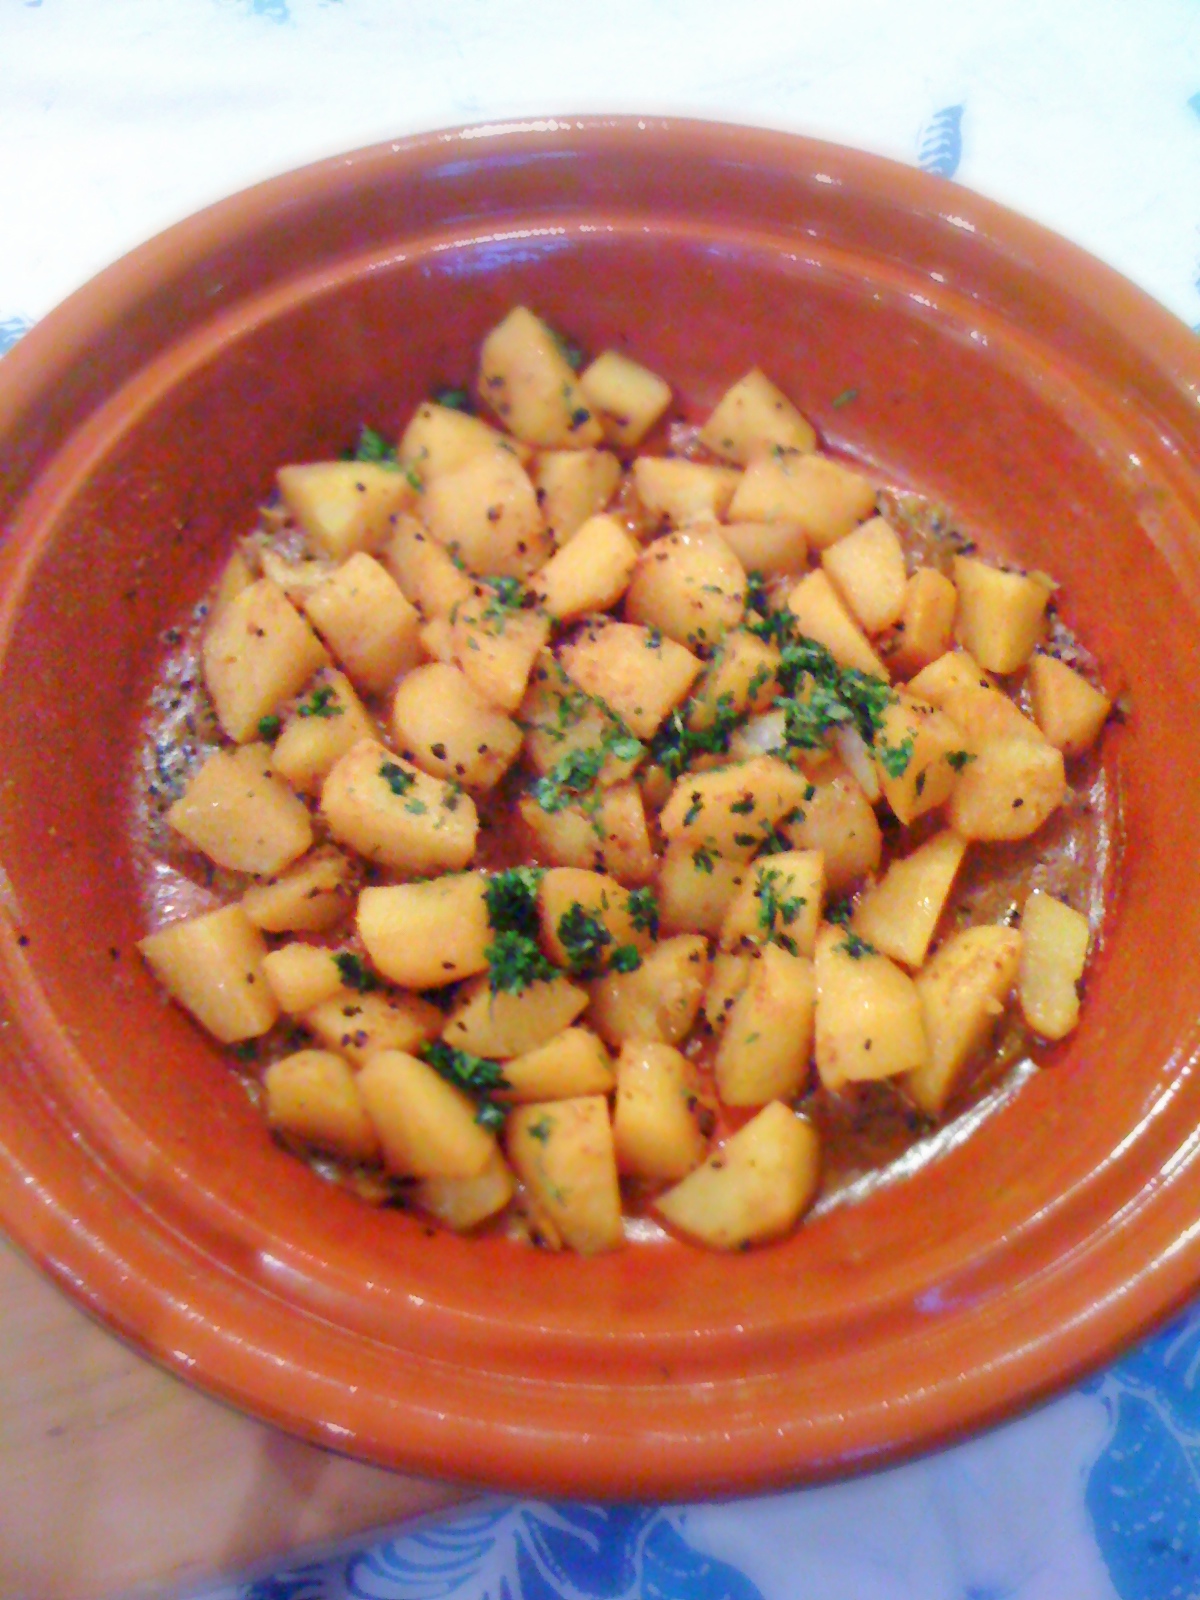
Nigella Potatoes, slow cooked in a tajine


The original recipe is here, and I have to say that I make it often because it is one of my favourite potato creations. A curious fact: when I published this recipe the first time I pointed out that it didn't have anything to do with Nigella Lawson, I that I called it nigella potatoes because of the nigella seeds. But funny enough after a few days I started receiving the Nigella Lawson newsletter in my inbox. I never signed up for it, so some web robot must have picked up my blog reference and details, and signed me in! Nigella must have a great PR team!
Anyway, back to the potatoes: the recipe is the same but I cooked the potatoes differently because my husband presented me with a big tajine :-).
Nigella Potatoes slow cooked in a tajine
Ingredients:
500 g potatoes (Agria or similar ‘floury’ potatoes)
2 tbsp vegetable oil
2 garlic cloves, peeled
1 tsp nigella seeds
Half tsp ground coriander
Half tsp cumin powder
1 tsp turmeric
Salt to taste
Water
 fresh coriander (or parsley) leaves

Peel the potatoes and cut into 4-5 cm cubes. Heat the oil in the tajine, then and add the garlic cloves and nigella seeds. 


When the seeds start to crackle add the ground coriander, cumin, turmeric, and a little salt. 


Add the cubed potatoes and coat well with the spices. Stir constantly, and when the potatoes start to become too dry add a cup of water.


Cover and simmer on lowest setting, stirring from time to time and adding water every time the mixture gets too dry. When all the potatoes are cooked, remove from the heat. It took me about one hour to cook the potatoes this way, in a normal saucepan they usually get quite mushy, but in the tajine they kept their shape beautifully!


Finely chop some washed fresh coriander or parsley (or a mixture of both) leaves, and add to the potatoes. Stir and serve. It was dark when I took the last photo, so the light wasn't good, but the potatoes were delicious!


Photos and Recipes by Alessandra Zecchini ©

Friday, October 5, 2012

Pumpkin and coconut soup with coriander and Vietnamese mint


The original recipe is here, but this time I didn't roast the pumpkin because... I had time to cut it! (I don't like cutting pumpkin...). Also I had some celery so I put that in too, plus one carrot and one onion.
I added water and organic veggie stock (Rapunzel), and when the veggies were soft I blended them with an immersion blender. 


 At this point I usually add the coconut milk/cream, but I didn't have any, so I used this coconut powder my husband brought me from a trip to Hainan in China (the place is famous for coconut!). he was told to place the content of a sachet in a cup and add hot water to make a hot coconut drink. We did, and it is ok, basically it is just coconut... but I am not really used to drink hot coconut milk, so I added 4 sachets to the soup instead (we still have plenty more). I simmer everything for a bit longer and then added coriander and Vietnamese mint to flavour.

I love this soup!!


Photos and Recipes by Alessandra Zecchini ©

Friday, September 28, 2012

Vegan Nashi Tart


I love nashi pears, pity that the season is short... mostly I eat them raw, cut into thin slices, but since I had quite a few I wanted to make a quick tart. This is too easy! I just used one sheet of ready rolled vegan puff pastry, then I peeled and cut 2 big nashi pears and placed the slices on top. I finished everything with a dusting of icing sugar and placed the tart in the oven until the edges of the tart were puffy and golden. As a final touch I sprayed the tart with some grappa spray. Nashi are good for cooking and baking because they keep their shape and don't become brown! This I will make again, it was even better than an apple tart, which is saying a lot (for me!).


Photos and Recipes by Alessandra Zecchini ©


Wednesday, September 26, 2012

Mandarin Chocolates


This is too easy! I just used some Fresh As  mandarin segments (they are freeze dried) and dipped them in melted dark chocolate (I used Whittaker's 72% Dark Ghana). That's all.


I am entering this super easy and almost "not even a recipe" in Sweet New Zealand, the blogging monthly events for Kiwis. 


Photos and Recipes by Alessandra Zecchini ©


Saturday, September 22, 2012

Vegan "Cape-pops", and a vegan pear and chocolate pie


Almost cake-pops because they look like cake-pops, but they are not made from cake! In fact these are Cape Gooseberries (therefore I am calling them Cape-pops :-)), dipped in dark chocolate. I left some plain, while I rolled the others in shredded coconut, ground pistachio nuts, and plum powder (my new discovery, I talked about it already in here). I let them set first at room temperature and then, because it was a warm day, in the fridge. These are gluten free too!


But more to come...


I had melted far too much chocolate for the Cape gooseberries, so I made a pie which, I must say, came out better than I had anticipated. But sometimes new discoveries are born out of chance, or leftovers!

I had a few sheets of filo pastry left, I placed them into a 23 cm pie dish lined with baking paper, leaving the corners to spill out. I peeled and cut four pears and placed the slices over the pastry, then drizzled the lot with Frangelico liqueur. I added the melted dark chocolate and closed the four corners of pastry over the filling. I wetted the top pastry with water and I added the rest of the coconut/pistachio stuff on top too (why waste it!). I baked the pie until the pastry was golden, and then I sprinkled a little icing sugar on top (this was the only sugar needed). I pie was perfect! Bittersweet and with an amazing texture, the chocolate had 'melted' into the pear slices... I will need to work on this and make it again, on purpose, and with more filo pastry, but I wanted to share it with you now because to me this was the perfect Vegan pie!!


Photos and Recipes by Alessandra Zecchini ©

Monday, September 10, 2012

Polenta cut with a string, like Grandma used to make


Usually I make soft polenta, I always preferred the soft type that you spoon into a plate and cover with a thick wild mushroom sauce or a stew, but memories are coming back of the type of polenta my Grandmother used to make in the North of Veneto: it was dense and stirred with a thick wooden stick in a gigantic pot over a wood fire, and then she pour the hot golden mass on a big wooden tray where it set hard in no time. She kept the polenta in the drawer of the kitchen table so you could get a slice at any time, and attached to the wooden tray there was a piece of string used to slice the polenta, so you didn't even need a knife.


Cutting polenta with a string


Of course I attached a string to my chopping board: I wanted to do the same as Grandma, and I hope that you will like the idea too. Serve the slices with your favorite casserole, or when the polenta is cold just grill the slices or fry them, or cut them really thin and use them instead of pasta for a gluten free lasagna.


Photos and Recipes  by Alessandra Zecchini ©

Thursday, August 30, 2012

Tiny new potatoes, two recipes with herbs and spices (and other veggies too...)


Potatoes and Cape gooseberries


The veggie garden is full of small potatoes, I picked a few, some really tiny, but I didn't want to leave them there, and the kids love them. I washed them and boil them, in three batches, from the largest to the tiniest.


After boiling them, the larger (but still new potato size) were then sautéed together with small steamed carrots and green beans in olive oil, garlic, smoked paprika, cumin seeds, chili flakes, coriander seeds, and salt. A very satisfying combo!


The smaller potatoes were sautéed with garlic, olive oil, rosemary, sage and salt. A real luxury to eat such small potatoes, but I need to make more space in the garden, and there are plenty more to dig up! 


Any suggestions for more tiny potato recipes?

Photos and Recipes by Alessandra Zecchini ©

Sunday, August 19, 2012

Sweet potato Vegan and gluten free cakes


 One of my favourite Japanese sweet is the baked sweet potato wagashi. I made something similar to this before, and I thought that the New Zealand kumara looks like a Japanese potato... but then I ended up with something completely different :-).


First of all kumara are much softer that Japanese sweet potatoes, then I only had an orange kumara at home (the red ones are better because they are white inside). I thought of baking my kumara, as steaming it was going to make it even softer and in the meantime I drunk a bit of Umeshu,  (my husband came back from Japan with a bottle of Choya Umeshu, sweet plum sake) and decided to soak a few sultanas in some too to add to my cakes. Once my kumara was done I quickly realized that it was going to be far too soft for molding, so I reverted to plan B, i.e. not shaping the sweets by chakin shibori (with a muslin cloth or handkerchief), but simply dropping them on the baking tray with a spoon! For one mashed kumara I added 2 tsp of brown sugar, and then 'dropped' three tablespoons of the mixture on the baking tray. I did the other three adding the sultana soaked in Umeshu, just to make a variation. 


 I baked everything at 180°C for about 15 minutes. To look at them I think that these are among the ugliest sweets I have ever made, but they tasted incredibly good, especially the ones with the sultana. I will make them again, but I will also look for some more 'floury' sweet potatoes (not kumara) so if you know where I can get some in Auckland please let me know!


Photos and Recipes by Alessandra Zecchini ©

Monday, August 6, 2012

Daikon and red beetroot raw "crackers"


I used a Japanese plum flower cutter, and a small heart cutter. The daikon and beetroots can be raw of cooked, it actually works well with raw daikon and cooked beetroot, but if you are on a raw diet keep everything raw. For dressing I just added a drop of olive oil and salt before serving. 


Photos and Recipes by Alessandra Zecchini ©


Tuesday, July 31, 2012

Daikon and Carrot Salad with Miso and Toasted Sesame Seeds


Peel a carrot and a piece of daikon as big as two carrots with a vegetable peeler. Discard the outer skin, and then continue 'peeling' to obtain long thin orange and white vegetable 'ribbons'. As you work drop the carrot and daikon strips into a bowl filled with water and lemon juice. Let the vegetables soak for about 30 minutes. In the meantime toast a tbsp or so of sesame seeds in a hot frying pan, and then mush them lightly with a mortar and pestle (I have a Japanese one for this, but any mortar and pestle will do). Set aside. In a small bowl thin one tbsp of miso (white or red) with a little hot water, or hot vegetable stock, into the consistency of a salad dressing (i.e.: not too runny, but not as thick as to be impossible to fold into a salad). Add 1 tbsp of soy sauce too, if you like (or gluten free tamari sauce). Drain the vegetables and add the miso dressing. Mix and divide between 4 bowls (if eating immediately, otherwise store in the fridge, covered, it will acquire even more flavour!). Before serving top each bowl with a pinch of crushed toasted sesame seeds. 


Photos and Recipes by Alessandra Zecchini ©

Friday, July 27, 2012

Italian borlotti beans cooked in a skillet


 The most famous borlotti beans are from the village of Lamon (not far from my Mum's place).


Fagioli in Padella


Soak the borlotti beans overnight, rinse and then cook with plenty of water and a bay leaf. Usually I add salt only at the end of cooking, then I keep the broth and a few beans for soup, and drain the rest to cook separately or use them in salads. Here I made them 'in padella' (in a skillet).

Sauté a shallot (sliced) or a couple of peeled garlic cloves with two tbsp of olive oil. Add the cooked borlotti beans, then about one cup of Italian tomato sauce (passata) and one cup of bean broth (or vegetable broth). Simmer on low for about 20 minutes, when the sauce thickens add half a tsp of smoked paprika (or some black pepper), adjust for salt and then finish everything with some more olive oil and plenty of fresh chopped parsley. 

In the past I didn't use chopped parsley with the paprika, but I do now, if I can: I find that parsley makes the beans easier to digest without... gas! Do you use parsley agains the 'effects' of beans? I also know that kombu seaweed, and bay leaves, are supposed to help, but if you know any other trick do let me know :-).


Photos and Recipe by Alessandra Zecchini ©

Monday, July 16, 2012

Aunt Alice's Artichokes


I have to say that the ingredients and cooking method are very similar to mine (and my mother's). We call it Roman style, possibly because both my Mum and my Aunt learned to make this in Rome (and I learned from them). But there are two main differences between my usual recipe which I always make in New Zealand (recipe here) and this one, simply due to ... availability!!! In NZ artichokes are still rare and quite expensive, so when I get a few I cook them with all the hard outer leaves (to be scraped with teeth at the table until you reach the heart) while here in Italy artichokes abound and so we can discard the outer leaves and cook only the tender hearts. 

The other difference is that while I cooked the whole artichokes "flower side up", the artichokes hearts with stalks are cooked "flower side down", and in this way you can leave a bit of the stalk in too, they are yummy and tender!

All you need to do is to:

Clean very well the artichokes discarding all the hard outer leaves. Also peel the stalks and keep up to 5 cm attached to the floret. As soon as one artichoke is cleaned drop it immediately in a bowl full of water and lemon juice or lemon slices. Keep the artichokes in the lemon water until cooking time. 

Finely chopped Italian parsley with garlic and salt, and then use this mixture to fill the centre of the artichokes (so far the recipe is like for the these artichokes) but then place the artichokes upside down into the pot (like in the photos, I only turned one up to show you what the inside would look like at the end of cooking), add a little extra virgin olive oil, a few more slices of garlic (if you like), another  pinch of salt, and a couple of fingers of water. Place on the stove on low, cover with a lid and simmer for about two hours, adding water from time to time, if needed.

Now there is one last thing to be said here: Aunt Alice had a wood fire stove (stufa, a bit like an Aga, I should remember to take a photo sometimes!) and in this way you can cook the artichokes (and many other dishes) really slowly, all they long... so the ones that she makes always have a special taste. Plus she has the patience to clean over 15 artichokes!


Photos and Recipe by Alessandra Zecchini and Aunt Alice ©