Sunday, July 31, 2011

Three soups


Roasted leek and Potato Soup with Leek Broth


Generally I sauté the potatoes and leeks in the pot to make this soup, but I wanted to try something different. So I cut the potatoes (Agria) and leek in big chunks, placed them in a roasting dish lined with baking paper, added olive oil and salt and roasted everything for about 30 minutes. I didn't want the potatoes to become brown, just lightly roasted on the outside, and soaking up the flavour from the leeks.


I washed the green leaves from the leek (the ones that are too hard to be eaten) and place them in a pot of  water with some rock salt. I cooked the leaves until I got a fragrant and light leek broth. I removed the leaves and added the content form the roasting pan, oil included. I cooked everything for other 30 minutes, then blended the soup with an immersion blender.


Pumpkin and Smoked Garlic Soup


Another good soup combo: Pumpkin and smoked garlic.
Here I just cooked some pumpkin (add a carrot for a brighter orange color) in vegetable stock, and before blending I added a couple of cloves of smoked garlic. More garlic salt and spices can be drizzled directly on the plate.


Potato and Broccolini Soup


And then broccolini (from my garden), and potato soup.
Simmer the veggies in vegetable stock, blend and drizzle with
extra virgin olive oil.


All these soups are vegan, inexpensive, easy to make, gluten free, and healthy :-).


Photos and Recipes by Alessandra Zecchini ©


Tuesday, July 26, 2011

Fresh Coconut Water


I am on holidays in Niue, this is why I haven't been posting much :-). Some friends got us fresh coconut, so good! This is how you open it to get the water out (about 3 glasses), better with a straw really, but I didn't have any, so I just let the water drip into the glass. After drinking the water you can break the coconut and get the flesh out.


Photos by Alessandra Zecchini ©

Tuesday, July 19, 2011

Green Curry Tofu and Beans with Rice Served on a Banana Leaf


I had some leftover green curry paste in the freezer. When I make green curry I usually have too much for one meal so I freeze the rest (it freezes really well). My paste is really simple, some fresh ginger (peeled) some shallot (also peeled), fresh coriander (with stalks), green chilli (not too much for me, maybe one or two), and fresh lemon grass (one stick). If you have kaffir lime leaves or rind, the are good too, apparently, but I didn't have any. You should use a mortar and pestle, but I just added a little salt and blended everything in the food mixer.


For the curry

1 tbsp of green curry paste
2 tbsp oil
Green and yellow beans
Tofu, cut in big pieces
1 can coconut cream
Water
Fresh Vietnamese mint
Chilli (optional)

accompany with a blend of long and wild rice.


Sizzle the curry paste with the oil, add the beans and tofu, and then the coconut cream. Fill up the empty can of coconut cream with water and add (this way you can rinse and save all the coconut cream that get stuck to the can). Add salt only if you need it (my paste was salty already). Cook for 20 minutes, then add the Vietnamese mint (but also fresh coriander or Thai basil, if you have them) and the chilli, if you wish. Serve with steamed rice.


I love setting the table for different occasions, and since what I like is to source my food from the garden or from the wild, I wanted to source my mise en place in the same way too.

 I have a corner in my garden that looks quite tropical, with a few banana plants.


I went out with my machete: dadadadaaammm!! Those of you who have meet me are probably giggling by now, I am not exactly a bush woman!


The leaves needs to be washed well, like you would do with china, and dried with a tea-towel.


For a romantic dinner share a leaf between two.
Food can be served directly on the leaf (use as a plate) so I put the rice on the leaf but left the curry (it has a liquid sauce) in a bowl. Then you can pour the curry over the rice (use a nice ethnic wooden spoon) and eat with... fingers?? I never managed to, so spoon and fork worked well for us.

Finally if you are into tofu, chocolate and vegan dessert, have a look at this recipe form the Bake Club.
I am always looking for some good vegan desserts, let me know if you have one to share :-).


Photos and Recipes by Alessandra Zecchini ©


Sunday, July 17, 2011

Tomato, Basil and Borage Flower Salad


This is a photo from a few months ago, when it was Summer in New Zealand, but I though that those readers who are in the Northern Hemisphere may like the idea. I made a simple salad with the produce from my garden: tomatoes, basil leaves, olive oil and salt (ok, olive oil and salt are not from my garden...), and some borage flowers for colour. It looked and tasted like a very happy salad :-).


Photos and Recipes by Alessandra Zecchini ©


Saturday, July 16, 2011

Fresh corn and broccolini salad with miso dressing


Boil the corn, cut off the kernels, add some steamed broccolini and dress the lot with a miso dressing (just white miso paste thinned down with a little hot water). Simple but delicious!  If you like to add more proteins just top this salad with a handful of sesame seeds.


Photos and Recipes by Alessandra Zecchini ©

Tuesday, July 12, 2011

Vegan Thai Salad Rolls with Dipping Sauces


This is Vegan, gluten free, fat free, light, and yet fully balanced and filling (or at least, it is for me :-)). Best consumed with beer, or with a glass of chilled white wine.


Vegan Thai Salad Rolls


On Saturday I went to the Oratia Farmers Market and bought some smoked salt and garlic. The smoked salt is really nice and mixed with a few spices and herbs, so I thought of using it to marinate some organic tofu to put inside my Thai salad rolls.


I cut the tofu into thin strips and then I sprinkled the salt on. After 30 minutes I turned the tofu slices over and sprinkled the smoked salt on the other side too. After other 30 minutes I lightly fried the tofu slices with rice bran oil. I put it on some kitchen paper to remove the excess oil, and set aside.


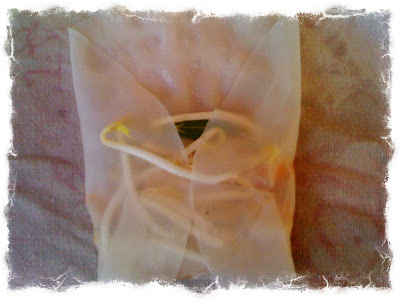
I used Thai rice paper wrap, which are gluten free. You need to soak the rice papers for a few minutes in warm water (five at the time) and then place them flat on a dried tea towel.


For the filling I also used some Thai chillies in brine, but not in all of the rolls, for others I used leaves of Vietnamese mint, but you can also use Thai basil and Thai mint. Then I used thin slices of carrots, chives, bean sprouts, and of course the tofu (each slice broken into two pieces for easy rolling).
You can also use shredded lettuce, and any other vegetable cut into Julienne strips.


Place the tofu and vegetable on the rice paper. Keep the decorative leaves/chillies a little to one side so that when you roll up your rolls they will be more visible.


Roll the rice paper, folding the sides in as you go, to seal the roll. The wet rice paper is sticky so it will seal well!


Herbs and chillies makes nice decorative motifs, and they are edible too. Make the most of them!

Place your rolls on serving plates, 5 or 6 per child (don't overdo it with the chillies for young kids)
and 7 or 8 per adult.


To serve I used three sauces: soy sauce, Thai sweet chilli sauce, and miso sauce (just a little miso paste diluted with hot water). Each sauce makes the rolls taste quite different!


My little boy loves Thai sweet chilli sauce, so he just had his own little dipping dish. Eat with fingers!


Photos and Recipes by Alessandra Zecchini ©


Sunday, July 10, 2011

Chocolate Coated Cape Gooseberries and Apricots


For the cape gooseberries I got the idea from my Italian blogger friends who were surprised that I could grow them in my garden. Apparently in Europe they are really expensive, and you only buy them to decorate important cakes, and to coat them with chocolate.

Usually I coat dried apricots with dairy free dark chocolate, my kids love them, especially the boy: he wants them for his birthday party! Sometimes when I make chocolate apricots I also roll some in shredded coconut, and then use the left over coconut to clean up the chocolate bowl, making little coconut chocolates.

It is all very easy, and in no time I have a tray full of sweet treats!


For the cape gooseberries I pulled back the outer "lanterns" that cover the berries and held them in place with a paper clip, so that they didn't get into the chocolate.


Photos and Recipes by Alessandra Zecchini ©


Friday, July 8, 2011

Easy Italian Tomato and Olive Sauce for Pasta, and 100 posts


This is post n.100, so now there are 108 recipes here.


Easy Italian Tomato and Olive Sauce for Pasta


Ingredients
2 x 400 g / 14 oz cans Italian peeled tomatoes
2 garlic cloves
salt to taste
2 tbsp olive oil
a few fresh basil leaves
Deli olives, mixed.

Place the content of the two Italian peeled tomato cans into a blender. Add two cloves of garlic, peeled, and blend until smooth. Put the “juice” into a large frying pan, and some water from rinsing the cans (optional). Bring to boil and then simmer, stirring from time to time, for at least 30 minutes, or until the sauce is so thick that when you stir it with a wooden spoon you can see the bottom of the pan (this is very important! most people undercook their tomato sauce and so it remains acidic!). 


At this point as the salt to taste, the olive oil, the fresh leaves of basil and a few olives (choose good deli olives in olive oil, not olives in vinegar. Good quality olives in brine are suitable, but rinse them well first). Cover and keep aside, warm, until needed.


Photos and Recipes by Alessandra Zecchini ©


Sunday, July 3, 2011

Love Heart Ume Onigiri


In the previous post I made heart sushi and talked about cooking sushi rice.
But if you don't have sushi rice, nori seaweed or sushi vinegar, or a sushi mat to roll your sushi, you can still try this method:
Cook some short grain (not long grain, basmati or Thai) rice by absorption and then start working it when it is still warm. Wet your hands with water, and rub them with just a little salt, then press some rice into a heart shaped cookie cutter. Add something colourful in the centre, I added a umeboshi (Japanese pickled plum), and then gently press the heart out of the mould into a serving plate.

This version is very easy and effective!


Photos and Recipes by Alessandra Zecchini ©