Friday, June 3, 2011

Garlic and Cilantro Guacamole

My little Max made Mexican dinner the other night. The highlight was guacamole, since he loves avocado. Making dinner for the family was on his school list of things and chores to do at home, everybody in his classroom had to do 7 things from a list of 10, and I think that he did pretty well :-).


The best guacamole is the one my Mexican primo Alejandro makes. Actually, he makes different types, all good, but when I have to make it I have some personal preferences:
1 I prefer smooth to chunky
2 I like it green, no tomatoes
3 I prefer garlic to onion
4 I don't like it spicy, I want to taste the avocado, not the chili.

Fussy ehhhh!!! So I gave Max all the ingredients for a garlic and cilantro smooth guacamole.
He had to mush (with a pestle) 5 small avocado with the juice of half a lemon. Then he added the garlic, squeezed (that was hard work!!!)


Finally he chopped the cilantro in my hollow herb chopping board (it comes with a curved herb knife which is quite easy to use). He likes doing that. He added the salt, to taste, and that took a while (he was adding about a grain at the time, just to be safe).


Taaaa Daaa!!! It was lovely!

Photos and Recipes by Alessandra Zecchini and Max ©


Wednesday, June 1, 2011

Strawberries and Balsamic non-alcoholic aperitif


It may sounds strange for those who live on the other side of the world, but I made this last Christmas, which is strawberry season in New Zealand. And now I visit other blogs and see strawberries everywhere and I have a craving! Fortunately there are frozen strawberries, so I can still make this, which will become more like a sorbet if I mix the strawberries still frozen.

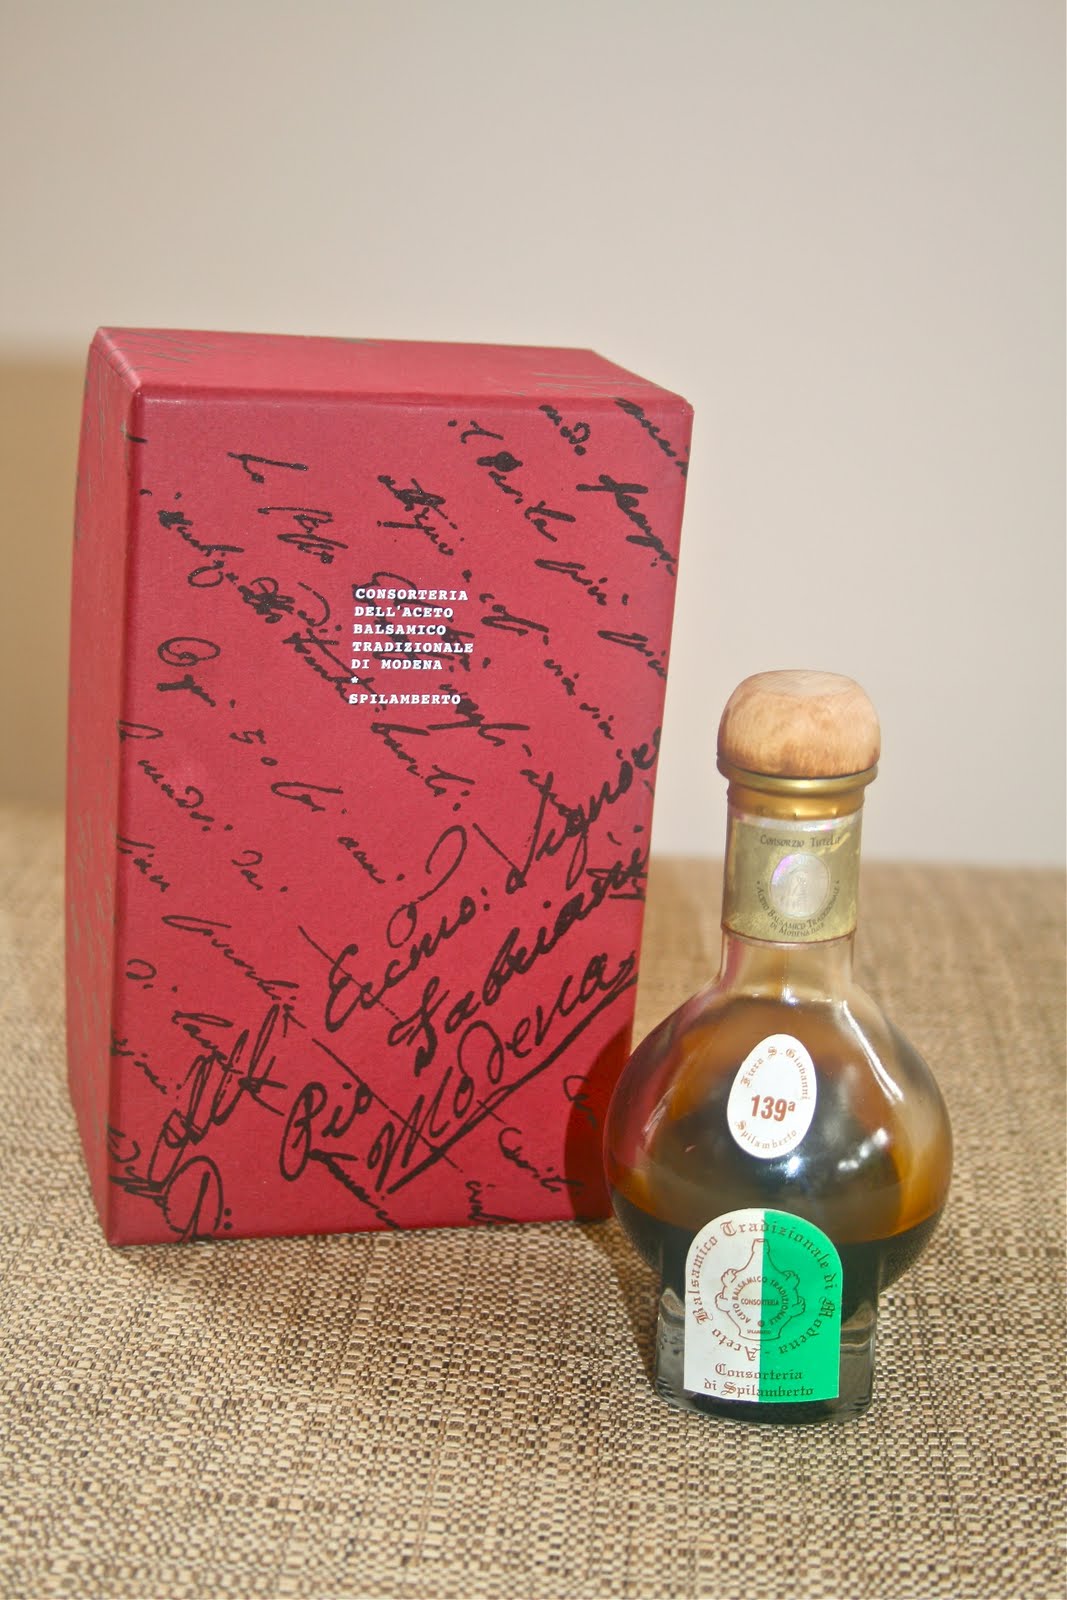
But my original drink (in the photo) is an aperitif: I used one punnet of fresh strawberries, washed, hulled and cut, 500ml of natural apple juice, and one tsp of Aceto Balsamico Tradizionale di Modena (ABTM).

The real ABTM is only sold in 100ml round bottles, like the one pictured below (very expensive and rare, but a little goes a long way!).

Blend everything well and serve in small glasses. Great aperitif before an 'important' meal, and suitable for children too!


Photos and Recipes by Alessandra Zecchini ©


I am entering this recipe in the blogging event Sweet New Zealand for December 2011, hosted by Bron Marshall


Tuesday, May 31, 2011

Tofu Balls and Chinese Vegetables with Ginger Sauce


Ingredients:

One pack fried tofu balls
one hand full of dried mixed Chinese mushrooms
2 small bok choy
1 large carrot
1 tbsp vegetable oil
one can of baby corn
1 tsp corn flour
1 tbsp soy sauce (choose gluten free for a celiac diet)
salt and pepper to taste
half tsp freshly grated ginger

Serves 4


I like fried tofu balls, I get them form the Chinese shop and they are very versatile. If you find them too greasy (usually they are not) you can rinse them under water and then pat them dry with kitchen paper.


Place the dried Chinese mushrooms in a bowl and soak with water for 1 hour.

Drain and keep the water aside to make the sauce later.


Wash well two small bok choy and one large carrot. Slice the carrot into stick, and cut the bock choy, putting the green leaves aside. Remember that you want to cook the vegetables very quickly, so that they stay crispy and colourful.


I don't have a wok, so I used my favourite pot, it gets very hot. Heat a tbsp of vegetable oil, add the mushrooms (be careful, they have a lot of water and they will pop in the hot oil), stir for a few minutes, then add the carrots and the white part of the bok choy. Stir and cook for two minutes.


Add the tofu balls and stir.


Add the content of the can of baby corn (including water) then add the bok choy leaves and cover for a couple of minutes. The leaves will steam nicely!


In the meantime make a thickening sauce. Add one tsp of cornflour to the water of mushrooms, a tbsp of say sauce, salt and pepper to taste, and half a tsp of freshly grated ginger. Personally I don't like to have too much sauce, but if you do, just add more water and cornflour.


Pour the sauce in the pot and stir until the sauce thickens. Serve immediately, with rice or rice noodles.


Photos and Recipes by Alessandra Zecchini ©


Saturday, May 28, 2011

Sun-dried Tomato Focaccia


I made another focaccia like the one I did in the previous post, but this time with sun-dried tomatoes (so if you don't like olives you can try this one). Very nice! If you want to try just follow this recipe but use chopped up sun-dried tomatoes (and the oil from the sun-dried tomato jar) instead of olives.

Photos and Recipes by Alessandra Zecchini ©


Wednesday, May 25, 2011

Olive Focaccia


One of my kids' favourite snack when they get home from school is a nice piece of freshly baked focaccia. I don't usually measure the ingredients, but the flour/water ratio is about 500 g of flour for 300 ml of water, plus a pinch of salt and 2 tsp of dried yeast granules and a pinch of sugar (this yeast dose is good up to 1 kg of flour). I made a dough.


While the dough was rising I cleaned the pantry and found a jar of the olives I marinated last year. They were still good, small (I picked them from a friend's tree) but very tasty.


First I needed to remove the stones, which I did with a knife. At first I did this over the jar, but it was messy and I wasted too much oil, so I drained a few olives (over the jar) little by little and then I cut the flesh off the stones.


I added the olives to the risen dough and mixed.


Then I left the dough to rise for a second time (I cannot give you exact times because I was mopping the house and making this focaccia at the same time... maybe 1 hour the first time and then 45 minutes?


I rolled the dough and resumed mopping (and you can see the mop in the picture!!!!) for other 30 minutes.


Then I made some little 'craters' with my fingers and added some olive oil from the olives' jar. I sprinkled with some rock salt on top.


Baked for about 30 minutes at 200 °C, and when the kids came home they smelled it immediately!!! Yum!!!!


Photos and Recipes by Alessandra Zecchini ©


Monday, May 23, 2011

Mushroom, Tofu and Coriander Dumplings (or Vegan Gyoza)


After making a stock with lots of dried mixed Asian mushrooms I had quite a few cooked mushrooms leftover, so I made some dumplings.


The ingredients are:

Cooked Asian mushrooms (about a cup)


Dumpling pastry (50 pieces, round)


Tofu, 1 block


Coriander (a few leaves and stalks)


Soy sauce, to taste (I always use Japanese soy sauce)


There are two more ingredients which I didn't photograph, one is
Sesame oil, 1 tsp
(I didn't take a photo because my bottle is too greasy and you cannot read the label)
and the second is
Bread crumbs, 1 or 2 tbsp
(I didn't take a photo because I was to busy mixing the filling)


Place the mushrooms, tofu, coriander, soy sauce and sesame oil in a food processor and pulse until you get a fine texture. Add the bread crumbs a little at the time to reach a workable thickness (the other ingredients have high liquid content). I add bread crumbs also because they give the filling a nice and balanced taste, bringing out the Umami in the other ingredients.
I didn't add salt: the mushrooms were cooked in a light vegetable stock, and the soy sauce is salted. But you can do what you like :-)


Here my daughter took over the camera for the first step by step pics.

Place a little filling on each pastry circle


Lightly wet the borders with water


Gently fold the pastry


Pinch the ends well and make sure that there are no air bubbles inside


If you can, try to make them look pretty!


Done!


Now Arantxa has a go! We had 50 dumplings to make, so it is good to do it with someone, or it gets boring!


To cook them:

Personally I really like steamed dumplings, or cooked in a soup, but we had soup the night before, and my family really liked them fried... but I didn't want to fry all those dumplings (too greasy) so I opted for a half-way. In Japan they make Gyosa, also called potstickers, you cook them quickly in a hot pot with very little oil.

Place them in the hot pot standing up so that the bottom get golden and lightly crunchy, then turn them on both sides (I did 25 at the time and it was hard work!!!). At the end you are supposed to put a lid on and let them simmer in their own steam for a few seconds, but because I had so many dumplings I pan fried them in two batches, then put them all back in the pot and added just a little water to create more steam. Lid on for a minute and they were ready and piping hot. We ate them with sweet chilli sauce and soy sauce, very filling, 50 between 4 people and our bellies were round, and satisfied!


Recipe by Alessandra Zecchini and Photos by Alessandra Zecchini and Arantxa Zecchini Dowling ©


Sunday, May 22, 2011

A Super Easy Vegan Pasta (with Florence fennel and chickpeas)


Rushed for time these days, I am at home more, but working, so I can let a pot simmer, but don't have much time to look after it... or to shop, or to plan a menu. And at the end of the day I want a complete meal all in one plate!

This is so easy, and filling...

1 large Florence fennel
2 tbsp vegetable margarine
1 can of chickpeas
salt and pepper to taste
500 g pasta (any type)
salt for the water

serves 4

Wash and slice the fennel into big chunks. Melt the margarine in a large frying pan (which you can cover with a lid). Add the fennel and then simmer, very slowly, for about one hour, adding a little water from time to time. I use quite a bit of margarine for this, about 2 tbsp.
When the fennel is soft add the chickpeas. Cook the pasta in salted boiling water. At this point every time I add a bit of water to the fennel I use the salted water from the pasta, which is full of starch and makes a nice sauce, and it is salted. At the end you may still want to adjust the sauce for salt, then drain the pasta and add to the sauce. Add freshly grated black pepper to finish.


Photos and Recipes by Alessandra Zecchini ©